
Step 1: Onboard Your Organisation
Sign Up & Credentials
Create your admin account at ponyrider.studio. Access the platform at stable.ponyrider.studio. A verification code will be sent to your email — check your junk folder if it doesn't arrive.
Organisation Identity
Upload your logo and set your business name. Your business name appears on all documents. You can modify this later under Settings > Business Info.
Choose a Plan
Select your subscription tier and complete payment to unlock your workspace. See Billing for plan details.
Step 2: Create a Client
Every project in Ponyrider must have a parent client.
- Navigate to Clients and click Add a Client.
- Start typing a company name — Ponyrider will help pre-fill business details.
- Enter the client's name, contact name, and contact email.
Step 3: Create a Quote (Optional)
- Navigate to Quotes and select Create New Quote.
- Specify your terms and conditions and set tax preferences (inclusive/exclusive).
- Add line items — Ponyrider calculates totals automatically.
- Download as PDF to send to your client.
Step 4: Set Up a Project
Define Project Details
- Go to Projects and click Add a Project.
- Complete mandatory fields: Name, Client, Client Reference, and Start/End Dates.
- Assign a Project Manager and toggle Billable Project ON if it contributes to invoicing.
- Enable Timesheets Need Approval if required before invoicing.
Assign Team Members
Click Add Member to build your project team. If a rate card is assigned to the client and the staff member has a department role with a configured rate, Ponyrider auto-populates their billing rate.
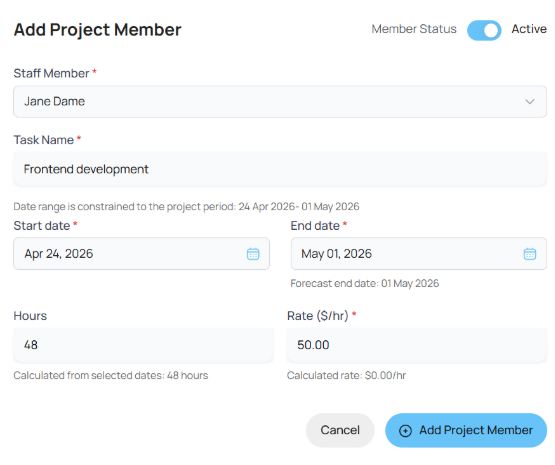
Figure: Add Project Member form showing staff member, task name, date range, hours, and billing rate fields.
Dynamic validation: Ponyrider cross-references total hours against the selected calendar range and automatically forecasts end dates. If hours don't fit the date window (accounting for holidays), you will be prompted to review.
Add Milestones
Click Add Milestone for stage-based billing. Milestones can feed directly into your final invoice. Click the green Start button when ready.
Step 5: Log Time
Navigate to Timesheets. There are four ways to log time:
Method A — Edit Timesheet
Click Edit Timesheet to enter edit mode. Type hours directly in the grid for each task per day, then click Save All Changes.
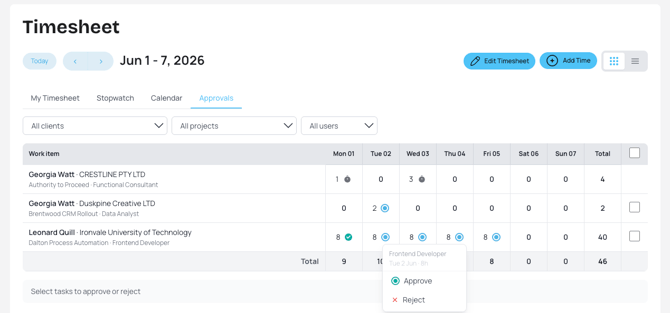
Figure: Timesheet grid in edit mode showing weekly hours input per task across multiple projects.
Method B — Add Time
Use the Add Time button for quick daily entries.
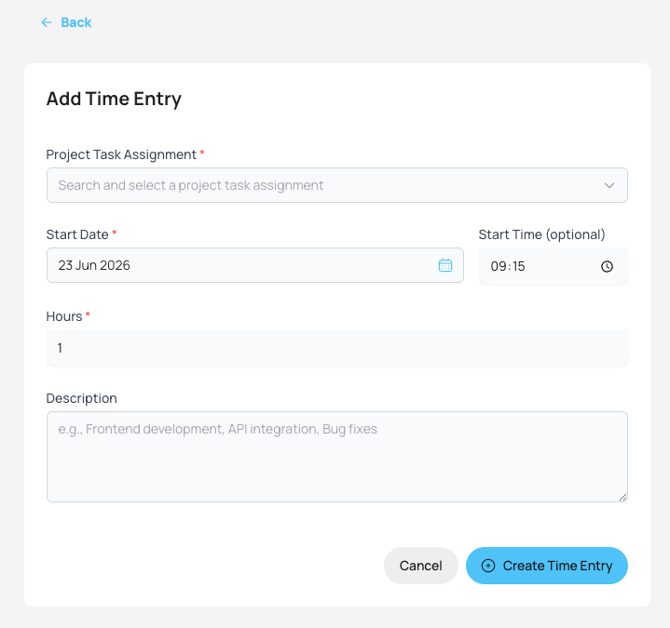
Figure: Add Time Entry form for logging daily hours against a project task assignment.
Method C — Stopwatch
Click Play on any task to record time in real time. Press Stop to save as a draft.
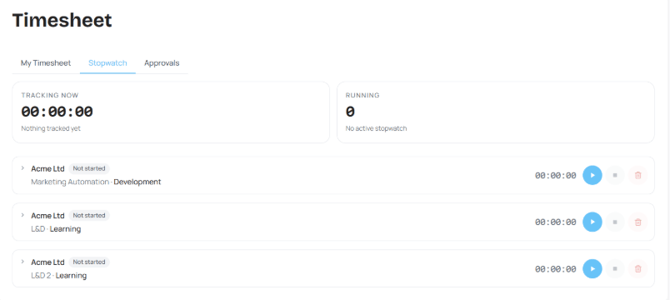
Figure: Stopwatch tab showing tracked time entries per project task with start/stop controls.
Method D — Calendar
Click and drag on an empty time slot to open the Add Time Entry form, pre-populated with the date and start time. Confirm the project, task, and duration, then save.
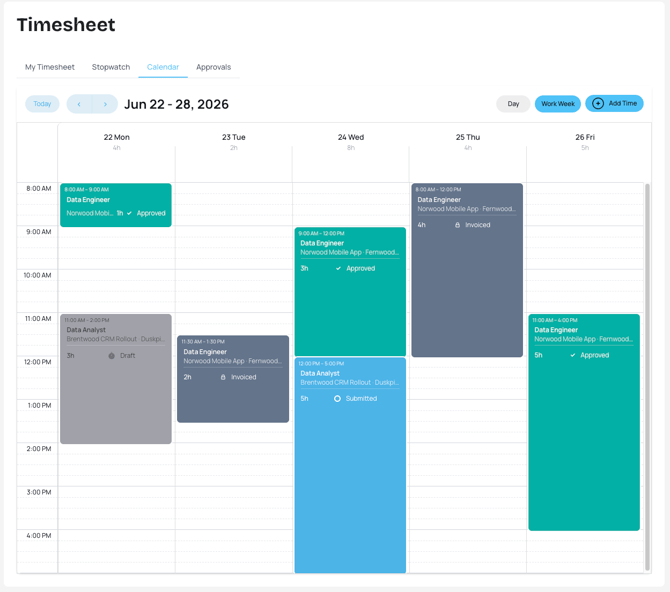
Figure: Timesheet calendar view showing colour-coded time blocks by status across the work week.
Once logged, submit entries using Submit Timesheets.
Step 6: Create an Invoice
- Navigate to Invoices and click Create New Invoice.
- Select the Client and Project, then set the date range.
- In the Timesheets tab, use checkboxes to include or exclude specific entries.
- Optionally select milestones in the Milestones tab.
- Review line items in the Invoice Lines tab, then click Create Invoice.
Note: Invoices cannot be created until a Tax Region is configured under Settings > Invoice. Once created, Ponyrider locks the associated timesheet entries to prevent duplicate billing.
Next: Customisations